Dryer Hose Clamp 90 Degrees: A Comprehensive Guide
The dryer hose clamp 90 degrees is a crucial component in the venting system of a clothes dryer. It is…
The dryer hose clamp 90 degrees is a crucial component in the venting system of a clothes dryer. It is designed to secure the dryer hose at a right angle, ensuring that the hot air and lint produced during the drying process are safely and efficiently expelled from the appliance. This article aims to provide a comprehensive guide on the importance, installation, maintenance, and safety considerations of dryer hose clamps at 90-degree bends.
Introduction to Dryer Hose Clamps
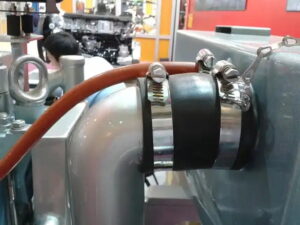
A dryer hose clamp is a metal or plastic device that is used to fasten the dryer vent hose to the dryer and the venting system. The clamp is typically tightened around the hose to create a secure seal, preventing air leaks and ensuring proper airflow. When the dryer hose is routed at a 90-degree angle, a specialized clamp is often required to maintain the integrity of the connection.
Importance of a Dryer Hose Clamp at 90 Degrees
1.Safety: A secure connection at a 90-degree bend is essential to prevent hot air and lint from escaping into the surrounding area, which could lead to a fire hazard.
2.Efficiency: A properly secured hose ensures that the dryer operates at peak efficiency, reducing energy consumption and drying times.
3.Durability: A clamp designed for 90-degree bends can withstand the stress of the hose being bent, preventing damage and extending the life of the venting system.
Types of Dryer Hose Clamps for 90-Degree Bends
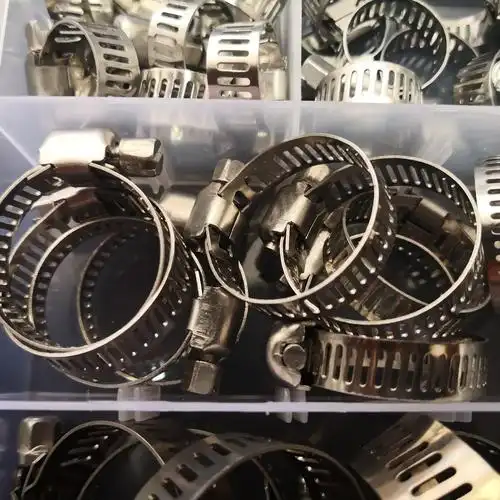
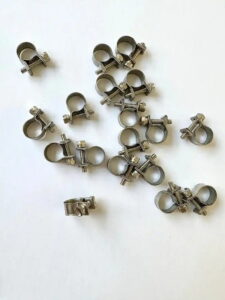
1.Metal Clamps: These are typically more durable and provide a strong grip on the hose. They are often used in commercial settings due to their robustness.
2.Plastic Clamps: These are more common in residential settings and are easier to install. However, they may not be as durable as metal clamps.
3.Spring-Loaded Clamps: These clamps have a spring mechanism that helps to maintain a constant pressure on the hose, ensuring a secure fit even with expansion and contraction due to heat.
Installation of a Dryer Hose Clamp at 90 Degrees
1.Prepare the Area: Ensure the area around the dryer and the venting system is clear and clean.
2.Measure and Cut: Measure the dryer hose to the appropriate length for the 90-degree bend and cut it using a utility knife.
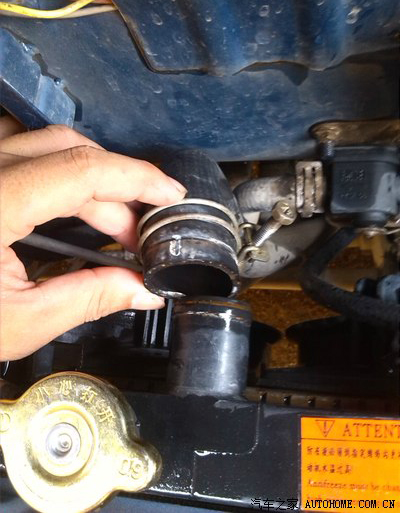
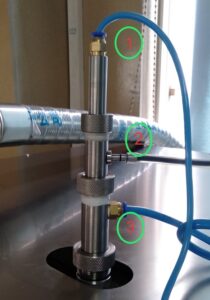
3.Attach the Clamp: Position the clamp around the hose before bending it. This will help to maintain the clamp’s position and ensure a secure fit.
4.Bend the Hose: Carefully bend the hose to the desired 90-degree angle. Use a hose bender tool if available to create a smooth bend.
5.Secure the Clamp: Tighten the clamp around the hose to create a secure seal. Ensure that the clamp is not overtightened, as this can damage the hose.
6.Connect to Vent: Attach the bent hose to the venting system and secure it with another clamp if necessary.
Maintenance and Inspection
1.Regular Checks: Regularly inspect the clamp for signs of wear or damage. A loose or damaged clamp can lead to air leaks and reduced dryer performance.
2.Clean the Vent: Periodically clean the venting system to remove lint buildup, which can affect the clamp’s effectiveness.
3.Replace as Needed: If the clamp shows signs of wear or damage, replace it with a new one to maintain the safety and efficiency of the venting system.
Safety Considerations
1.Proper Venting: Ensure that the venting system is properly installed and meets local building codes to prevent fires and other safety hazards.
2.No Kinks or Crushes: Avoid kinking or crushing the hose, as this can restrict airflow and lead to overheating.
3.Professional Installation: If you are unsure about the installation process, consider hiring a professional to ensure the clamp and venting system are installed correctly.
Final Conclusion
The dryer hose clamp at the 90-degree bend is a critical component to the safe and efficient operation of a clothes dryer. By understanding the importance of this clamp, knowing the different types available, and following proper installation and maintenance procedures, homeowners can ensure their dryer venting system operates safely and efficiently. Regular inspection and prompt replacement of worn or damaged clamps is essential to maintaining the integrity of the venting system and preventing potential safety hazards.
1. Installation problems and solutions
1. It is difficult to align the hose at a 90-degree angle for installation
Reason: It may be due to the narrow installation space, obstructed vision or lack of suitable tools to assist positioning.
Solution: Use an installation tool with adjustable angles, such as a wrench or clamp with an angle scale, to roughly fix the hose and the connection port at a 90-degree position, and then slowly fine-tune and install the clamp. You can also use a pencil or tape to mark the 90-degree position on the hose and the connection port before installation for more accurate alignment.
2. The clamp is loose after installation
Reason: It may be that the size of the clamp does not match the hose and the connection port, or the tightening force is not enough.
Solution: Re-measure the outer diameter of the hose and the connection port, and select a 90-degree hose clamp of the appropriate size. When tightening, use a suitable screwdriver or wrench to tighten according to the specified torque. Generally, refer to the torque requirements in the product manual. If there is no clear instruction, tighten moderately first, then check whether there is a gap between the clamp and the hose, and tighten slightly if necessary, but avoid over-tightening to damage the hose.
2. Problems and solutions during use
1. Air leakage
Reason: The clamp may become loose due to vibration over time, or the hose itself may be damaged or aged, resulting in poor sealing.
Solution: Check the tightness of the clamp regularly, and tighten it in time if it is loose. For the problem of the hose, if the damage is small, you can use high-temperature resistant sealing tape for temporary repair, but it is best to replace the new hose as soon as possible. At the same time, check whether there are foreign objects or impurities on the contact surface between the clamp and the hose and the connection port that affect the seal. If there are any, clean them up.
2. Noise
Reason: The clamp may be installed loosely, causing the hose to shake and hit surrounding objects during exhaust; or it may be due to poor airflow at the 90-degree turn, causing turbulence and noise.
Solution: Strengthen the installation of the clamp to ensure the stability of the hose. For the problem of poor airflow, you can check whether there is excessive bending or blockage at the 90-degree turn, and adjust the curvature of the hose appropriately to make it transition more smoothly. You can also consider installing a guide device at the turn to improve the airflow state and reduce noise.
3. Maintenance and care problems and solutions

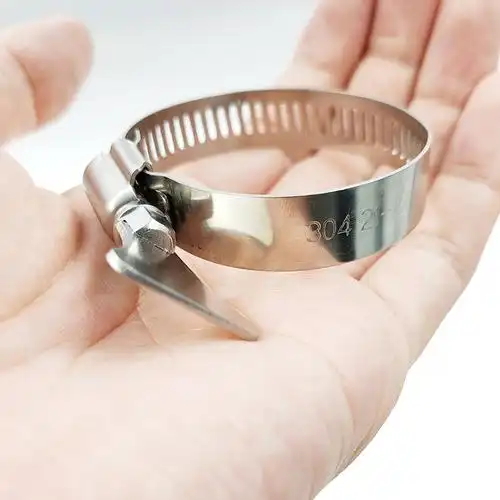
1. Rust and corrosion of the clip
Reason: If the dryer is placed in a humid environment, or the material of the clip itself has poor corrosion resistance, it is easy to rust.
Solution: Choose a 90-degree hose clamp made of stainless steel, which has better corrosion resistance. If it is already rusted, you can use a rust remover to remove the rust, and then apply a layer of anti-rust paint or grease to prevent further rust. At the same time, improve the humidity of the environment around the dryer, such as maintaining good ventilation, using dehumidification equipment, etc.
2. Don’t know when to replace the clip
Reason: There is a lack of judgment criteria for the service life and wear of the clip.
Solution: Check the appearance of the clip regularly. If there is severe rust, deformation, cracks, etc., it should be replaced in time. Generally speaking, if the dryer is used frequently, check the condition of the clip every 1-2 years; if it is used less, it can be checked every 3-5 years. At the same time, every time the dryer is maintained, the clip should be included as one of the inspection items, and its service life, appearance and actual performance should be considered to decide whether to replace it.