How to put a hose clamp back together?
Hose clamps play a vital role in various pipe connections, whether it is the water pipes in the home, the…
Hose clamps play a vital role in various pipe connections, whether it is the water pipes in the home, the oil pipes in the car, or the various hose connections in industrial equipment, it can ensure the tightness of the pipe connection and prevent liquid or gas leakage. But sometimes, the hose clamp may be disassembled due to maintenance, hose replacement or other reasons, then it needs to be reassembled. The following is a detailed guide to the steps of hose clamp reassembly to help you complete this task smoothly.
1. Preparation
Before you start reassembling the hose clamp, you need to do the following preparations:
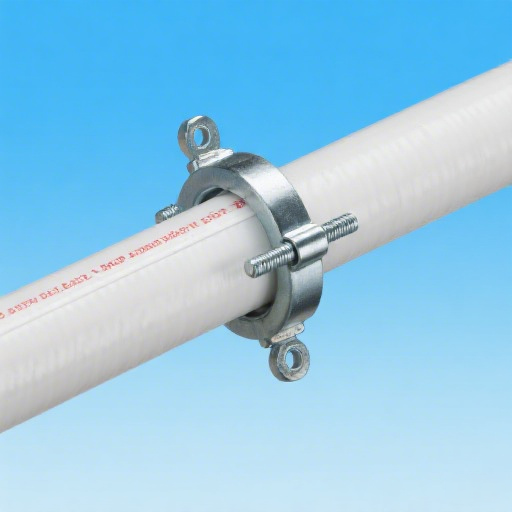
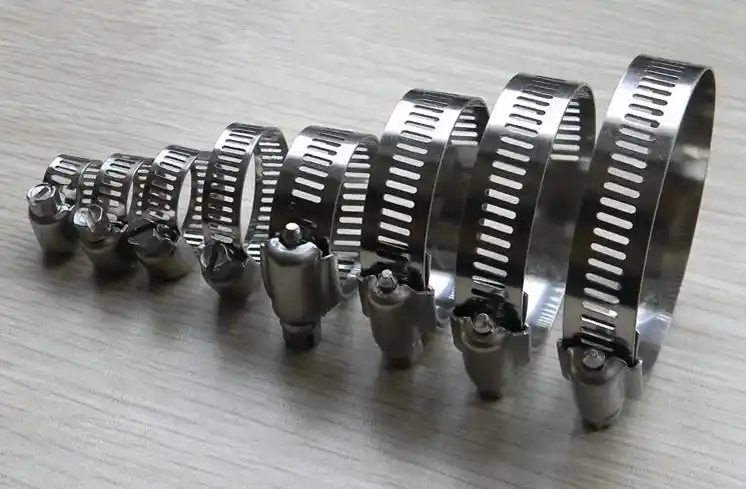
1.Confirm the type of hose clamp: Common hose clamps include worm gear type, spring type, ear type, etc. Different types of hose clamps have slightly different structures and assembly methods, so first determine the specific type of hose clamp you have in hand so that you can use the correct assembly method.
2.Check the integrity of the parts: Carefully check the various parts of the hose clamp, including the clamp body, bolts, nuts (if it is a worm gear type), springs (if it is a spring type), etc., to ensure that no parts are missing or damaged. If damaged parts are found, they should be replaced with new parts in time, otherwise it may affect the normal use and sealing effect of the hose clamp.
3.Clean parts: Use a clean cloth or paper towel to wipe the various parts of the hose clamp to remove dirt, dust, grease and other impurities on the surface. This not only helps with subsequent assembly operations, but also ensures that the hose clamp can fit the hose tightly after installation to achieve good sealing performance.
4.Prepare tools: Prepare the corresponding tools according to the type of hose clamp. Generally speaking, tools such as screwdrivers, wrenches, and pliers may be required. For example, for a worm gear hose clamp, you may need a screwdriver to tighten the bolt; for an ear hose clamp, you may need pliers to adjust the position of the clamp ears.
2. Assembly steps of different types of hose clamps
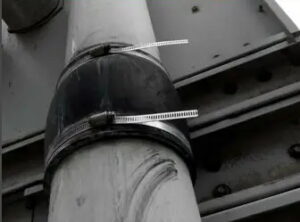
1. Worm gear hose clamp
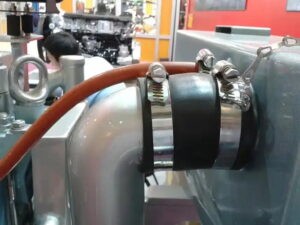
1. Place the hose on the pipe to be connected, making sure that the hose port is flat and fits tightly with the pipe.
2. Pick up the body of the hose clamp and wrap it around the connection between the hose and the pipe. The opening of the clamp body should be in the direction that is convenient for operating the bolt.
3. Insert the bolt: Pass the bolt through the hole on the clamp body, making sure that the bolt can pass smoothly and there is no damage or impurities on the threaded part.
4. Tighten the nut: Use a wrench or screwdriver to screw the nut on the bolt and tighten it gradually in a clockwise direction. During the tightening process, pay attention to the degree of clamping of the hose by the hose clamp. Do not over-tighten it to avoid damaging the hose, but do not under-tighten it to cause a poor seal. Generally speaking, when it is difficult to continue to twist the nut by hand, you can tighten it a little harder, but judge according to the actual situation to ensure that the hose clamp can firmly fix the hose and there is no leakage.
2.Spring-loaded hose clamp
1. Also, put the hose correctly on the pipe first to ensure that the connection is smooth and without gaps.
2. Put the clamp body of the spring hose clamp on the hose so that the spring is in a natural state, and the opening position of the clamp body is convenient for subsequent operations.
3. Use your hands or pliers to gradually bring the two ends of the clamp body closer together so that the spring begins to be compressed. During the compression process, make sure that the clamp body is evenly around the hose, and it should not be skewed or partially too tight or too loose.
4. When the two ends of the clamp body are close to the appropriate position, connect the connecting parts (such as slots, hooks, etc.) at both ends of the clamp body to fix the position of the clamp body. At this time, the spring will maintain a certain compression force, so that the hose clamp tightly clamps the hose to complete the assembly.
3. Ear-shaped hose clamp
1. After installing the hose on the pipe, wrap the ear-shaped hose clamp around the connection between the hose and the pipe so that the ear-shaped structure on the clamp is evenly distributed around.
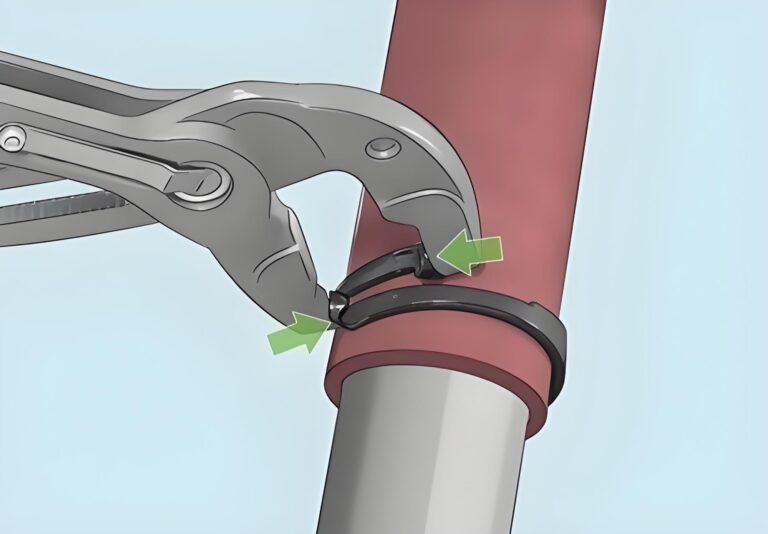
2. Use pliers or other suitable tools to bend the relative ear-shaped structures one by one so that they are close to each other and overlap. During the bending process, pay attention to uniform force to avoid breaking or excessive deformation of the ear-shaped structure, which will affect the clamping effect.
3. For some ear-shaped hose clamps with bolts or rivets, after bending the ear-shaped structure, you can pass the bolts or rivets through the corresponding holes and tighten them with nuts or tools to further enhance the clamping force and connection stability.
3. Inspection after assembly
After reassembling the hose clamp, do not rush to put it into use. The following inspections are required:
1. Appearance inspection: Carefully check all parts of the hose clamp to ensure that the parts are installed correctly and there is no sign of looseness. The clamp body fits tightly to the hose without obvious gaps or warping.
2. Sealing test: If conditions permit, a simple sealing test can be performed. For pipelines that transport liquids, you can slowly open the liquid source after connecting the hose clamp and observe whether there is liquid leakage at the connection; for pipelines that transport gas, you can use soapy water to apply to the connection. If bubbles are generated, it means there is a leak. If a leak is found, the liquid or gas source should be immediately turned off, the installation of the hose clamp should be rechecked, and necessary adjustments or reassembly should be made.
Successfully reassemble the hose clamp and ensure its normal use and good sealing performance. During the operation, if you encounter difficulties or uncertain situations, it is recommended to refer to the instructions of the relevant products or consult professionals.

4. Common Problems
1. Parts are missing or damaged
After disassembling the hose clamp, you may find that some small parts, such as bolts, nuts, washers, etc. are missing or damaged. This may be due to negligence during the disassembly process or aging and wear of the parts themselves. For example, the thread of the bolt may be screwed and the washer may be broken, which will affect the reassembly of the hose clamp.
2. Difficult to align the installation position
When reinstalling the hose clamp on the hose and pipe fittings, you may encounter the problem of difficulty in accurately aligning the installation position. The hose may be deformed or displaced due to previous use, and there may be some irregularities at the interface of the pipe fitting, which will cause the hose clamp to not be smoothly put on the correct position, thereby affecting the clamping effect and sealing performance.
3. The clamping force is difficult to adjust properly
After reassembly, adjusting the clamping force of the hose clamp is a key step. Without the right tools or experience, the clamping force may be too large or too small. Excessive clamping force may damage the hose, causing it to break or deform; too small clamping force cannot guarantee a good sealing effect and is prone to leakage.
5. Solutions
1. For missing or damaged parts
If you find that a part is missing, first determine the specific model and specification of the missing part. You can refer to the original packaging of the hose clamp, the product manual, or the maintenance manual of the equipment. Then, go to a professional hardware store or equipment accessories supplier to purchase parts of the same model for replacement. For damaged parts, such as bolts with damaged threads, you can use taps and die tools to repair them, or directly replace new bolts. If the gasket is broken, you can choose a suitable gasket for replacement based on the material, thickness, and inner diameter of the original gasket. When installing new parts, make sure that they are installed in the correct position. For example, the gasket should be placed between the bolt and nut and the hose clamp body to play a role in buffering and uniform force.
2. For difficult to align installation positions
Before installation, carefully check the interface of the hose and pipe fittings to clean up any debris, dirt, or old sealing materials that may exist. If the hose is deformed, try to gently correct it to restore it to a shape close to its original shape. For irregularities in the pipe fitting interface, you can use sandpaper or a file to lightly polish it to make the surface flatter and smoother. When aligning the installation position, you can first put half of the hose clamp on the hose, then slowly move the hose to align it with the interface of the pipe fitting, and then close the other half of the hose clamp. If it is still difficult to align, you can use some auxiliary tools, such as a small clamp or a screwdriver, to adjust the position by prying or fixing to ensure that the hose clamp can be accurately installed in the part that needs to be clamped.
3. For the clamping force that is difficult to adjust properly
First, prepare suitable tools to adjust the clamping force, such as a torque wrench or an ordinary wrench. If a torque wrench is used, set the correct torque value according to the specifications of the hose clamp and the requirements of the equipment. For hose clamps without torque requirements, they can be adjusted by experience and feel, but it should be noted that the clamping force should be gradually increased during the tightening process, and the status of the hose should be constantly checked. After tightening a little, observe whether the hose has signs of deformation or excessive extrusion. If so, loosen it appropriately and then continue to fine-tune. In addition, you can also refer to the clamping degree of the hose clamp on the same type of equipment as a reference standard for adjustment. After adjusting the clamping force, it is best to perform a pressure test, such as filling the pipeline system with a certain pressure of gas or liquid to check whether there is leakage at the connection, and further adjust the clamping force according to the test results until the ideal sealing and clamping effect is achieved.