How to remove hose clamps
In various systems involving pipe and hose connections, hose clamps play a vital role. They can ensure a tight connection…
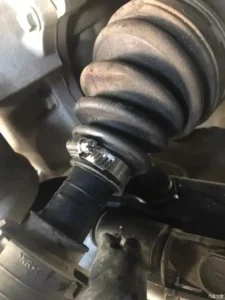
In various systems involving pipe and hose connections, hose clamps play a vital role. They can ensure a tight connection between hoses and fittings to prevent liquid or gas leakage. However, hose clamps often need to be removed when performing equipment maintenance, repairs, or component replacement. Correctly removing hose clamps can not only improve work efficiency, but also avoid damage to hoses and other related components. This article will introduce the methods and steps for removing hose clamps in detail.
1. Understand the types of hose clamps
Before you start disassembling, you must first identify the type of hose clamp you are facing. Common hose clamps are mainly the following:
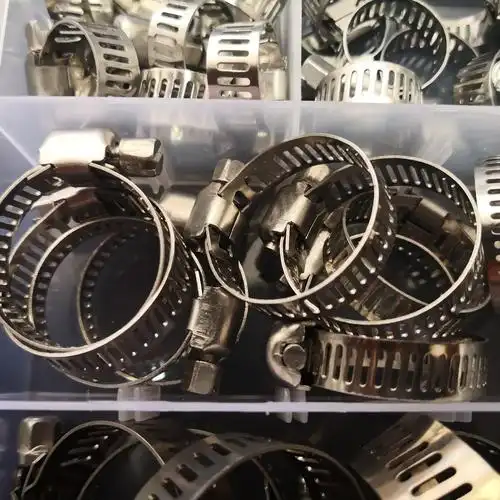
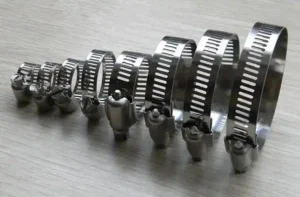
1. Worm Gear Clamp: This is the most common type of hose clamp. It consists of a threaded steel belt and a worm gear. By rotating the worm, the steel belt will tighten or loosen, thereby clamping or loosening the hose. It is widely used in the cooling system, fuel system of the car and the water pipe connection of the home.
2. Spring Clamp: This clamp relies on the built-in spring to provide tension, so that the clamp is tightly clamped on the hose. It is relatively easy to install and remove, and is often used in some occasions where the clamping force requirements are not particularly high, such as the ventilation hose connection of some electrical equipment.
3. Constant Tension Clamp: The constant tension clamp can always maintain uniform and stable pressure on the hose under different working conditions to ensure the reliability of the connection. It is usually used in systems with extremely strict sealing requirements, such as the air conditioning system of the car.
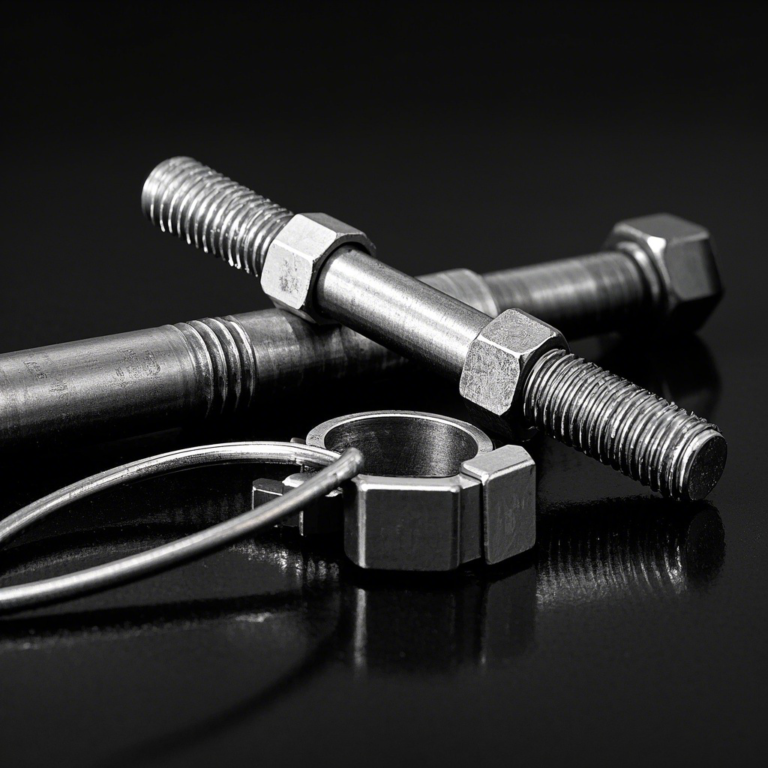
4. Single-Ear Clamp: Also known as a crimping clamp, it achieves the clamping function by crimping one end of the metal belt into an ear. It is generally used in places where high space requirements are required and compact installation is required.
2. Spring Clamp: This clamp relies on the built-in spring to provide tension, so that the clamp is tightly clamped on the hose. It is relatively easy to install and remove, and is often used in some occasions where the clamping force requirements are not particularly high, such as the ventilation hose connection of some electrical equipment.
3. Constant Tension Clamp: The constant tension clamp can always maintain uniform and stable pressure on the hose under different working conditions to ensure the reliability of the connection. It is usually used in systems with extremely strict sealing requirements, such as the air conditioning system of the car.
4. Single-Ear Clamp: Also known as a crimping clamp, it achieves the clamping function by crimping one end of the metal belt into an ear. It is generally used in places where high space requirements are required and compact installation is required.
2. Preparation
1. Tool preparation: Prepare the appropriate tools according to the type of hose clamp. For worm gear clamps, a screwdriver of the right size is needed to facilitate the rotation of the screw on the worm; to remove spring clamps, a pair of needle-nosed pliers or a special spring clamp removal tool is usually required; constant tension clamps require a wrench to loosen their tensioning bolts; single-ear clamps may require side cutting pliers or needle-nosed pliers. In addition, a flashlight should be prepared for operation in dim light or in a small space.
2. Safety protection: During operation, be sure to wear protective gloves to prevent your hands from being scratched by the edge of the clamp, or avoid contact with potentially harmful substances when handling hoses connected to liquids or gases. If high temperature or high pressure systems are involved, be sure that the system has cooled down or the pressure has been released to avoid accidents.
3. Determine the location: Carefully find the location of the hose clamp that needs to be removed. Some hose clamps may be located inside the equipment or in a more hidden place, and you need to carefully remove the surrounding obstacles so that you can clearly see the clamp and operate it.
3. Disassembly steps
1. Removal of the worm gear clamp: Insert a screwdriver into the screw slot on the worm gear and slowly rotate the screw in a counterclockwise direction. During the rotation process, pay attention to the looseness of the clamp and do not use excessive force to avoid damaging the screw or clamp. When the screw is rotated to a certain extent, the steel band of the clamp will gradually loosen the restraint on the hose. Then, gently slide the clamp off the hose.
2. Removal of the spring clamp: Use needle-nosed pliers to clamp the ears on both sides of the spring clamp, and then squeeze the pliers inward to release the tension of the spring. While squeezing, slide the pliers along the direction of the steel band of the clamp until the clamp is completely loosened, and finally remove it from the hose. If the clamp is tight, you can try to apply some lubricant to the ears to help loosen it.
3. Removal of the constant tension clamp: Use a wrench to clamp the tensioning bolt on the constant tension clamp, turn the wrench in a counterclockwise direction, and gradually loosen the bolt. As the bolt loosens, the pressure of the clamp on the hose will decrease. When the clamp loosens to a certain extent, remove it from the hose. It should be noted that constant tension clamps are usually used in more important systems. When removing and reinstalling, ensure the accuracy of the operation to avoid affecting the normal operation of the system.
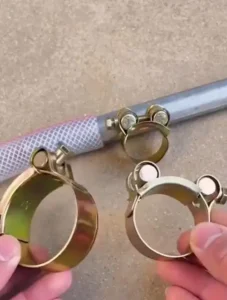
4. Removal of single-ear clamp: If it is a standard single-ear clamp with ears, first clamp the ear of the clamp with needle-nosed pliers, bend the ear slightly outward to create a small gap. Then, insert a flat-head screwdriver into this gap and gently pry the clamp to gradually loosen it. When the clamp is loose to a certain extent, remove it from the hose. For single-ear clamps without ears, use side cutting pliers to carefully cut the metal strip at the bottom where the clamp contacts the hose, but be careful to avoid cutting the hose. After cutting, remove the two parts of the clamp from the hose.
2. Removal of the spring clamp: Use needle-nosed pliers to clamp the ears on both sides of the spring clamp, and then squeeze the pliers inward to release the tension of the spring. While squeezing, slide the pliers along the direction of the steel band of the clamp until the clamp is completely loosened, and finally remove it from the hose. If the clamp is tight, you can try to apply some lubricant to the ears to help loosen it.
3. Removal of the constant tension clamp: Use a wrench to clamp the tensioning bolt on the constant tension clamp, turn the wrench in a counterclockwise direction, and gradually loosen the bolt. As the bolt loosens, the pressure of the clamp on the hose will decrease. When the clamp loosens to a certain extent, remove it from the hose. It should be noted that constant tension clamps are usually used in more important systems. When removing and reinstalling, ensure the accuracy of the operation to avoid affecting the normal operation of the system.
4. Removal of single-ear clamp: If it is a standard single-ear clamp with ears, first clamp the ear of the clamp with needle-nosed pliers, bend the ear slightly outward to create a small gap. Then, insert a flat-head screwdriver into this gap and gently pry the clamp to gradually loosen it. When the clamp is loose to a certain extent, remove it from the hose. For single-ear clamps without ears, use side cutting pliers to carefully cut the metal strip at the bottom where the clamp contacts the hose, but be careful to avoid cutting the hose. After cutting, remove the two parts of the clamp from the hose.
4. Precautions
1. Avoid excessive force: During the disassembly process, no matter what tool is used, avoid excessive force. Excessive force may cause damage to the clamp, screw stripping, and may even scratch or break the hose, affecting its subsequent use.
2. Record the position and direction of the clamp: Before disassembly, it is best to mark or remember the position and direction of the clamp on the hose so that it can be accurately restored to its original state when reinstalled to ensure the clamping effect of the clamp and the sealing of the system.
3. Check the condition of the hose: After removing the clamp, carefully check the surface of the hose for wear, aging, cracks, etc. If a problem is found with the hose, it should be replaced in time to avoid leakage and other faults in subsequent use.
4. Keep the clamps and tools properly: Keep the removed clamps properly to avoid loss or damage. At the same time, clean the used tools and put them back in place for next use.
In short, although disassembling hose clamps seems simple, it requires a clear understanding of different types of clamps and the correct use of tools and operating procedures. Only in this way can the disassembly work be completed safely and efficiently, laying a good foundation for the maintenance and repair of equipment.