
How to Use Gap Free Hose Clamps
Gap – free hose clamps, also known as seamless hose clamps, are designed to provide a secure and leak…

Gap – free hose clamps, also known as seamless hose clamps, are designed to provide a secure and leak – proof connection for hoses in various applications. Their unique design eliminates the gap found in traditional hose clamps, reducing the risk of fluid leakage and improving overall performance. However, to fully benefit from these clamps, proper usage is essential. This article will guide you through the steps of using gap – free hose clamps effectively, ensuring a reliable and long – lasting hose connection.
1. Selecting the Right Gap – Free Hose Clamp
Before using a gap – free hose clamp, the first and crucial step is to select the appropriate clamp for your specific application. Consider the following factors:
- Size and Diameter: Measure the outer diameter of the hose accurately. Gap – free hose clamps come in a variety of sizes, and choosing the right one that fits snugly around the hose is vital. A clamp that is too large will not provide sufficient clamping force, while one that is too small may damage the hose or be difficult to install.
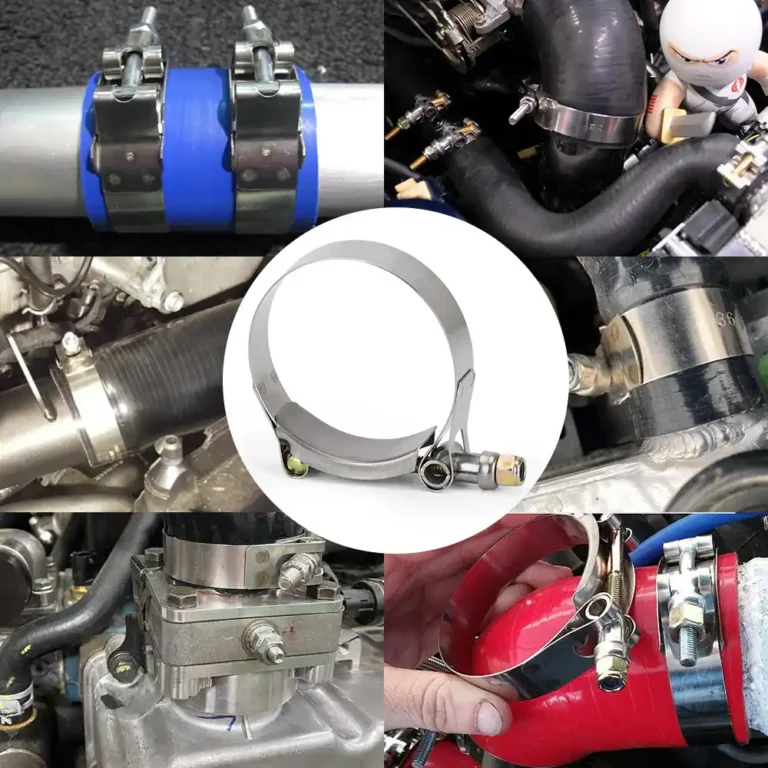
- Material: Gap – free hose clamps are typically made from materials such as stainless steel, galvanized steel, or plastic. Stainless steel clamps are highly resistant to corrosion and offer excellent durability, making them suitable for harsh environments, such as automotive engines or marine applications. Galvanized steel clamps are more cost – effective but may not be as corrosion – resistant as stainless steel. Plastic clamps are lightweight and ideal for low – pressure applications where corrosion is not a significant concern, such as in some household plumbing or irrigation systems.
- Application Requirements: Different applications have different requirements for hose clamps. For high – pressure applications, like in industrial hydraulic systems, you need a clamp with a high – strength rating. In food and beverage or pharmaceutical industries, where hygiene is critical, stainless steel or food – grade plastic clamps should be used to ensure compliance with safety standards.
2. Preparation Before Installation
Once you have selected the right gap – free hose clamp, proper preparation is necessary before installation:
- Clean the Hose and Fitting: Thoroughly clean the outer surface of the hose and the fitting where the clamp will be placed. Remove any dirt, debris, grease, or old adhesive residues. A clean surface ensures a better seal and prevents contaminants from interfering with the clamping process. You can use a suitable cleaner, such as isopropyl alcohol for plastic hoses or a degreaser for rubber hoses, and a clean cloth or brush to clean the surfaces.
- Check for Hose and Fitting Damage: Inspect the hose and fitting for any signs of damage, such as cracks, cuts, or deformations. A damaged hose or fitting can compromise the effectiveness of the hose clamp and lead to leaks. If any damage is found, replace the hose or fitting before proceeding with the installation.
3. Installation Process
Follow these steps to install the gap – free hose clamp correctly:
- Position the Hose: Place the hose over the fitting, ensuring that it is centered and fully seated. The hose should extend evenly beyond the end of the fitting to provide a sufficient area for the clamp to grip.
- Slide on the Clamp: Slide the gap – free hose clamp onto the hose, positioning it over the area where the hose and fitting overlap. Make sure the clamp is straight and not tilted. Some gap – free hose clamps have a locking mechanism or a specific orientation; refer to the manufacturer’s instructions to ensure proper placement.
- Tighten the Clamp: Use an appropriate tool, such as a screwdriver or a special hose – clamp tightening tool, to tighten the clamp. Start by tightening the screw or bolt gradually, alternating between sides if the clamp has multiple points of adjustment. Do not overtighten the clamp initially, as this may cause damage to the hose. Instead, tighten it just enough to hold the hose in place temporarily.
- Check the Seal and Adjust: After the initial tightening, check for any signs of leakage by applying a small amount of pressure to the hose system (if possible). If there is a leak, continue tightening the clamp slightly until the leak stops. However, be careful not to over – tighten, as excessive force can deform the hose or damage the clamp itself. Once a secure seal is achieved, ensure that the clamp is evenly tightened all around.
4. Maintenance and Inspection
Regular maintenance and inspection of gap – free hose clamps are essential to ensure their continued reliable performance:
- Periodic Checks: Regularly inspect the hose clamps for signs of wear, corrosion, or loosening. Look for any cracks in the clamp, rust formation (if applicable), or movement of the clamp on the hose. Check the tightness of the clamp screws or bolts and retighten if necessary. The frequency of these checks depends on the application; for example, in automotive engines, hoses and clamps should be inspected during routine maintenance intervals, while in household plumbing, a quarterly inspection may be sufficient.
- Replace Worn – Out Clamps: If a hose clamp shows significant signs of wear, damage, or has lost its clamping ability, replace it immediately. Do not wait for a leak to occur, as this can lead to more extensive damage to the system and potential safety hazards.
- Clean and Lubricate (if applicable): In some cases, especially for metal hose clamps, cleaning and lubricating the screw or bolt can help prevent rust and ensure smooth operation during tightening and loosening. Use a suitable lubricant, such as silicone spray or a light – duty grease, but be careful not to get lubricant on the hose itself, as it may cause the hose to deteriorate over time.
In conclusion, using gap – free hose clamps effectively involves proper selection, careful installation, and regular maintenance. By following these steps, you can ensure a secure and leak – proof hose connection, enhancing the performance and longevity of your hose system in various applications, whether it’s in automotive, industrial, or household settings.


English
Hose clamps are indeed crucial for ensuring leak-free connections in various systems. The Gap-free hose clamps seem to offer superior performance due to their seamless design. Reusable band hose clamps provide flexibility and durability in both automotive and industrial applications. It’s interesting how CV boots and hose clamps work together to protect and secure automotive systems. How do Gap-free hose clamps compare to traditional ones in terms of installation and maintenance? German news in Russian (новости Германии)— quirky, bold, and hypnotically captivating. Like a telegram from a parallel Europe. Care to take a peek?