
How to use hose clamp and common problem solving
Hose clamp is a tool widely used in various pipe connections and fluid delivery systems. Correct use of it is…
Hose clamp is a tool widely used in various pipe connections and fluid delivery systems. Correct use of it is essential to ensure the sealing and stability of the system.
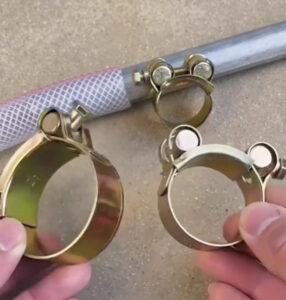
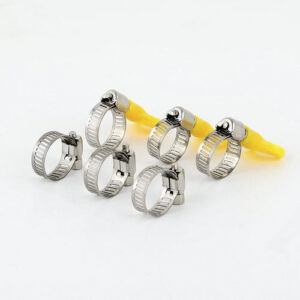
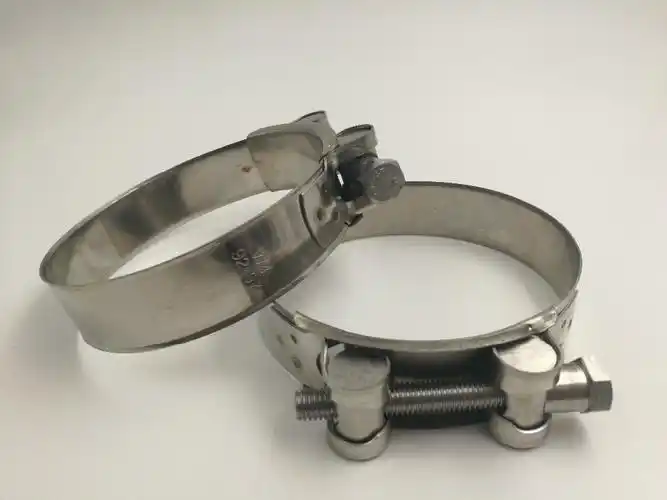
1. Choose the right hose clamp
First, you need to select the appropriate hose clamp according to the size of the hose and pipe fittings to be connected. Hose clamps come in a variety of specifications, and the most common ones are marked by the range of pipe diameters they can clamp. For example, if the outer diameter of the hose to be connected is 15 mm, you need to choose a hose clamp that can cover this size and has the right clamping force. If the selected clamp is too large, it may not provide sufficient clamping force, resulting in leakage; while a clamp that is too small may damage the hose.
2. Preparation
Before installing the hose clamp, make sure the connection between the hose and the pipe is clean, dry and free of debris. Any dust, oil or other foreign matter may affect the clamp’s grip and sealing performance. For new hoses, it may be necessary to trim the ends to ensure a better fit with the pipe.
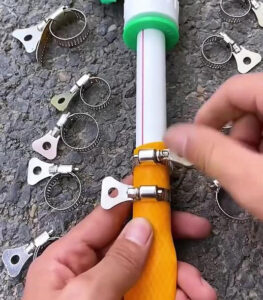
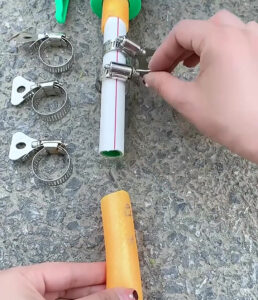
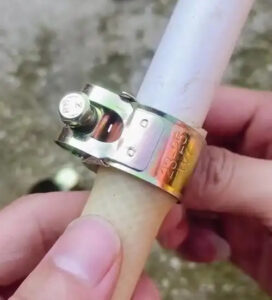
3. Install the hose clamp
1. Put the hose on the corresponding pipe fitting to ensure that the hose is inserted to the appropriate depth. Generally, the hose is required to completely cover the connection part of the pipe fitting and have a certain overlap length, usually about 10-15 mm.
2. Pick up the hose clamp and align its opening with the connection between the hose and the pipe fitting. For some simple ear-shaped or U-shaped hose clamps, you can directly tighten the screws with tools such as screwdrivers or wrenches to gradually increase the clamping force. During the tightening process, pay attention to evenly apply force to avoid deformation of the hose or poor sealing due to unilateral force on the clamp. Generally, tighten it a little first, then check whether the relative position of the hose and the pipe fitting is correct. If there is any deviation, adjust it in time, and finally tighten it completely.
3. For some more complex hose clamps with special structures, such as stainless steel worm gear hose clamps, you need to put the clamp on the appropriate position on the hose first, and then rotate the worm to gradually tighten the toothed part of the clamp to clamp the hose. This type of clamp can provide a more uniform and stable clamping force. When operating, you should also pay attention to the direction and force of rotation to ensure that the clamp is firmly installed and well sealed.
4. Inspection and Testing
After installation, carefully check the connection parts. You can visually check whether the clamp is installed in place and whether there is a gap or deformation between the hose and the pipe fitting. You can also perform a simple pressure test. For example, for a hose system that transports liquids, you can first pass a small amount of liquid to check whether there is leakage at the connection; for a system that transports gas, you can use a pressure gauge to perform a pressure test to observe whether the pressure can be stably maintained within the specified range. If leakage or unstable pressure is found, it is necessary to further check and adjust the clamping force of the hose clamp, or check whether the hose and pipe fittings are damaged.
Common problems and solutions:
1. Leakage problem
Reason:The clamping force of the hose clamp is insufficient, which may be due to the clamp being too large or not tightened enough.
The hose surface is uneven or damaged, which makes it impossible to fit tightly with the pipe fitting, and leakage will occur even if the clamp is clamped tightly.
There are defects in the connection part of the pipe fitting, such as burrs, cracks, etc., which affect the sealing effect.
Solution:If the clamping force is insufficient, for the screw hose clamp, the screw can be further tightened, but be careful not to over-tighten to avoid damaging the hose; for the worm gear hose clamp, the number of rotations can be appropriately increased to increase the clamping force. If the selected size is too large, the hose clamp of the appropriate specification should be replaced.
If the surface of the hose is uneven or damaged, you can try to wrap some sealing tape around the damaged part for minor damage, and then reinstall the hose clamp; if it is serious, you need to replace a new hose.
For defects in the connection parts of the pipe fittings, the pipe fittings need to be repaired or replaced, such as removing burrs, welding cracks, etc., and then reconnecting and installing the hose clamp.
2. Hose damage problem
Reason:Over-tightening the hose clamp will cause the hose to be deformed, cracked or indented due to excessive pressure, which will affect the service life and performance of the hose.
The material of the hose clamp is incompatible with the hose, and a chemical reaction will occur during long-term contact, causing the hose to age and deteriorate.
Solution:If it is over-tightened, the hose clamp should be loosened appropriately and adjusted to the appropriate clamping force. You can refer to the material and specification of the hose to determine the appropriate clamping force range. At the same time, you can use tools such as torque wrenches to accurately control the tightening torque during installation to avoid excessive force.
If it is a material incompatibility problem, you need to replace the hose clamp that matches the hose material. For example, for rubber hoses, you should choose metal or plastic hose clamps that will not corrode or age the rubber; for hoses made of some special materials, such as silicone hoses, use special silicone hose clamps or specially treated clamps.
3. Difficulty in disassembly
Reason:After long-term use, the hose clamp rusts or is clogged with dirt and impurities, causing the clamp to be unable to loosen normally. Over-tightening or improper installation causes excessive friction or bite between the clamp and the hose or pipe fitting.
Solution:If it is a rust problem, you can first use rust remover to spray on the active parts of the clamp such as screws and worms, wait for a while, and then try to remove it with tools. For clamps blocked by dirt and impurities, you can first clean the surface of the clamp and the surrounding foreign matter, and then remove it.
For difficult removal due to over-tightening or improper installation, you can try to gently tap the clamp to loosen it, and then slowly loosen the screws or rotate the worm. When installing a new hose clamp, pay attention to the correct installation method and tightening force to avoid similar problems from happening again.
By correctly mastering the use of hose clamps and understanding the solutions to common problems, hose clamps can be better applied in pipeline connections and fluid delivery systems to ensure safe and stable operation of the system.


You’ve written something that resonates on a deeper level, not just with the mind, but with the heart.